modding_guides folder you get bundled with the game.
Let's start of quick and easy, use this TOC (Table of Contents) to easily find what you're looking for.
/resources/enemyjson files for custom ghosts / enemies.
houselang~.
soundsprite
/resources/ folder and from its AppData folder./AppData/Local/ folder have priority over the folder within the installation directory, which is the /resources/ folder./AppData/Local/ folder by following these steps.%appdata% into the directory bar on the topWindows Key + R and typing in %appdata%.
RoamingAppData\Local\Ghosts_and_Japes
main.sav/resources/house/.
/sprites/.
/_progen/ ===README.txt is another file called KEY.png, this file can be used to color pick the exact color code, every color tells the game what to place where within your custom room, go wild!KEY.png can be found here: KEY Colors.KEY.png file, it is also recommended that you draw using the brush size at 1 or the pencil tool, to make it easier for you to make rooms or sprites."spr_progen_"..progen..png sprite file in any way, the game will automatically regenerate the files for you.16x16, 16x29, 31x8, whatever you want..progen file, it will not go into the installation directory's resource folder./AppData/Local/Ghosts_and_Japes/ directory, as explained previously..png file, the game will not add it to the rooms that will generate in-game list, even if the .progen file exists..progen files for you inside the folder /AppData/Local/Ghosts_and_Japes.
KEY.pngKEY.png file we mentioned a bit ago.
KEY.png file and below this text you should see all the Color Codes./(insert enemy name here)/ ===cool_ghost but it loads the sprites from the uncool_ghost folder just fine.eat, gameover, grabbed, idle, MASK and painting.16x16 pixels, the sprite sheet should end up being the size of 64x16.
The dialog portraits are completely optional, if you want your custom ghost to have a voice at all.strings_en.txt file to make a textbox sequence render that portrait./painting/ ===spr_obj_painting_"./player/ ===strings_en.txt file.MASK sprite is used for the player's interaction collision range.gameover sprite is used for if the player is somehow defeated by something other than a ghost./projectile/ ===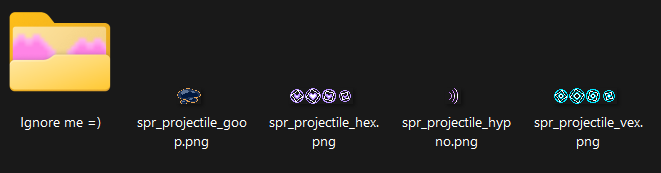
/sound/ folder.
/sound/ ===.ogg format.
/lang/ ===/lang/ folder is where nearly all text, aside from a few hard-coded in-game ones, are stored inside of.'"txt.cool_string_name.0":' is the text's identifier.[speaker.spr_portrait_player_neutral.snd_vox_player] - Here, you can set who is speaking aloud the dialog.., the name of the portrait sprite must be specific.., you specify the voice sound they use for reading their dialog.[color.rgb.0,255,0] - You can color your text to any color by supplying RGB values.Hello, would show up in green.[wait.amount.5] - How long to wait before reading the letters after this tag. In this case, it's 5, which means it waits 5 frames. This game runs in 30 FPS.[motion.wavy.20] - This moves every individual letter it affects in an orbit around its origin point.[reset] - This is used to reset and remove all previous text formatting that were applied to the text. So, after the green Hello, that had wavy letters as well, the text after the [reset] would no longer have wavy motion or green applied.[motion.rando.1] - Moves each letter in a random direction around its origin point, which has the effect of looking jittery. The number specified, 1, means each letter moves between -1 to 1 around the letter's origin point on its x- and y- axis.[wait.amount.30] afterwards or else the ghost's dialog disappears immediately as soon as the ghost is done talking to the player.
[speaker.sprite_name_here.audio_name_here] - With this tag, you place it at the start of a text, and that will tell the textbox to render sprite_name_here on the left inside of the textbox, and play audio_name_here for every time a letter (a-z) is read in the textbox.[color.rgb.255,255,255] - With this tag, you can color text after its position in the text using RGB values separated by commas.[reset] tag is read.[reset])
[motion.motion_name_here.value] - There are a few different options with this tag.motion_name_here, you have these options:rando makes the text have a jittery appearance.value dictates how much the text jitters away from its origin point, in pixels. Values MUST be whole numbers (integers).wavy makes the text orbit around is origin point.value dictates how many degrees to rotate around its origin per frame. Note that the game runs in 30 FPS. Value must be whole numbers (integers).singsongy is the exact same as wavy, but it will not move left or right. Value must be whole numbers (integers).wobbly is the exact same as wavy, but it will not move up or down. Value must be whole numbers (integers).
[wait.amount.value] - Use this tag to indicate when the text should wait a certain amount of frames before continuing.value with the number of frames to wait before continuing to read the text.[wait.amount.30] would make the textbox wait 30 frames (or 1 second, since the game runs in 30 FPS) before continuing to read..choicec - You can specify choices the player can input, at the end of the string, separating them with |.grab_player - After this text finishes, the initiator of the text (if an enemy) will grab the player and begin attacking them./house/ ===/house/ folder is where certain specific permanent game flags are set.house" files, as I will continue to refer to them by./AppData/Local/Ghosts_and_Japes/resources/house/ and the game installation's directory's /resources/house/ folder.size - Here, you can specify how large every floor of the game should be.16, has a minimum of 8, and a maximum of 3072.16 feels best to play.8 means every floor is very short, and 3072 means every floor is gigantic.
grave - This file keeps track of how many enemies you have defeated across all playthroughs.intro1 - A simple file that keeps track of whether or not you saw the player's intro dialog from playing for the first time.item_swap_explanation - Similar to "intro1", keeps track of whether or not you had alternate item hand swapping explained to you yet.opt_music - Options menu setting; where the music toggle is stored.opt_window_fullscreen - Options menu setting; where the fullscreen toggle is stored.opt_window_scale - Options menu setting; where the window scale is stored./enemy/ ===/enemy/ folder..inactive files..json to anything else that doesn't start with .json.angello.json and look over its contents, for example:{}) in enemy json files, with 1 of them being entirely optional.
Anim" ===idle - The general sprite the enemy uses.grabbed - The 1st frame is shown when the enemy is stunned by a flash of light. While it is being attacked by a player, the entire animation plays.eat - Plays while the enemy attacks the player.painting - The enemy's room painting replacement. If you didn't know, when enemies spawn, if there's a painting in a room, there's a chance they can possess a painting when spawning.game_over - The enemy's game over art that is displayed if it defeats the player.MASK - The enemy's interaction range collision mask.sprite", "speed", "glow" and "offset" as you can see.
sprite", you specify the name of the sprite file.speed", you specify the frames per second of the sprite's animation speed. If you set it to 0, it will not animate.glow", you specify the sprite's visibility. If it's set to true, the enemy will render above darkness and fog layer.idle", "grabbed", "eat", and "projectile".
offset", you specify how far on the x- and y- axis it should be rendered from its origin point.game_over", to adjust the sprite's positioning.Specs", there will also be an anim section labelled "projectile", which is an array of structs.magi.json, for example. Here, this enemy has a list of structs for anim "projectile".projectile" struct and what each value means.
sprite - The sprite that the projectile uses. It can be animated or not.speed - The animation speed (in frames per second) that the projectile sprite animates.move_speed - How fast the projectile should move, in units per frame.shoot_speed - How fast the enemy should shoot when it is time to shoot, in seconds.shooter" behavior, this means it will shoot "shoot_speed" seconds after it re-appears from disappearing.polluter" behavior, it means it will shoot this projectile every "shoot_speed" seconds while it's around.
behavior - The projectile's behavior. Currently, there are 3:homing" - Will follow the playernormal" - Will travel in a line in the direction it was shot out fromnormal_rotate" - Same as "normal", but it rotates towards where it's going
lifetime - How long, in seconds, the projectile should (at most) be allowed to live for before disappearing. Again, non-whole numbers are okay.glow - Similar to how enemy glow value behaves. If it's set to true, it will render above the darkness and fog layers, and vice versa for false.hit - Here, you specify what the projectile should do upon it hitting the player.effect", you can set it to...entrance" - Causes the player to forcefully walk towards whoever hit it.shrink" - Causes the player to shrink, rendering them unable to fight back.damage" - Deals flat damage to the player.amount", what you specify here depends on the "effect".entrance" - How long the player should be entranced.shrink" - How long the player should stay shrunken.damage" - How much damage to deal to the player.
sound - The sound effect to play when the projectile is shot.
behavior - How the enemy should behave. You can set it to:normal": Enemy chases the player as usual.shooter": Enemy chases the player, but also shoots a projectile towards the player after it re-appears.polluter": Enemy chases the player, but also shoots a projectile towards the player in a certain interval.friendly": Enemy roams around randomly, and can be spoken to if the player is near.
appearances - An array of where this enemy should spawn. Currently, there are 6 unique values you can enter:normal"dungeon"overgrowth"water"boiler"dark"health - Has 2 sub-values:amount": The amount of health the enemy has.
- "loss": How fast the enemy loses health from being siphoned by the player.
damage - How much damage the enemy does to the player every time it attacks it.struggle - How many times a player must press left or right to escape from it.speedup - How many "eat" "Anim" loops must play before the enemy begins to attack faster.sound - The sound to play every time the enemy attacks a player.speed - How fast the enemy should move, in units per frame. Can be a non-whole number.panic - Has 2 sub-values:panic": The movement speed multiplier for how fast the enemy should move while being siphoned by a player.randomness": A random range of angles for movement direction that the enemy should move in away from the player that is siphoning it. Larger numbers make it behave more erratically, while lower numbers make it move in a more straight-like line. Can be non-whole numbers.
pull - Has 2 sub-values:amount": How long a player can pull on the enemy while siphoning them, in seconds. Can be a non-whole number.cooldown": How long a player has to wait, after pulling for "pull.amount" seconds, before a player can pull on it again, in seconds. Can be a non-whole number.
Dialog" ===kaishi.json for an example of using both lang file-loaded strings and embedded strings.txt.my_enemy.0", and so on..choicec" in its key if you want to be able to make a dialog with choices..grab_player" in a lang file entry's key to make it so once that dialog entry ends, the enemy speaking immediately grabs the player.initial_grab - When the enemy initially grabs the player.hide_and_seek - When the enemy initially grabs a player that was hiding in a box.entrancement - When the enemy initially grabs a player under the effects of entrancement.shrunk - When the enemy initially grabs a player under the effects of being shrunk. This dialog takes priority over the entrancement dialog.taking_too_long - When the player has not resisted against the enemy for a long time.power_outage - When the power goes out and the enemy exists.health_milestone - Sub-values:sixtypercent - When the player being attacked by the enemy has reached 60% health remaining, as long as the enemy can deal more than 0 damage.thirtypercent - When the player being attacked by the enemy has reached 30% health remaining, as long as the enemy can deal more than 0 damage.love_two - First dialog that plays after a while of the enemy healing the player, as long as the enemy deals less than 0 damage (is a healer).love_three - Second dialog that plays after a while of the enemy healing the player, as long as the enemy deals less than 0 damage (is a healer).love_four - Third and final dialog that plays after a while of the enemy healing the player, as long as the enemy deals less than 0 damage (is a healer).
gameover - Sub-values:attempted - When the enemy has defeated the player, and the player has resisted at least once.gaveup - When the enemy has defeated the player, and the player didn't resist at any point.absorbed - After the game over sequence, if the player waits until the enemy has stolen all of the player's max health, this dialog will replace the game over sequence.talk_to - Only applicable for enemies with a behavior value of " friendly". Sub-values:main - The main dialog to display upon talking to the enemy for the first time.response1 - The dialog to display upon selecting choice 1 in the main dialog.response2 - Same as above, but with 2nd choice from main dialog.response3 - Same as above, but with 3rd choice from main dialog.response4 - Same as above, but with 4th choice from main dialog.response5 - Same as above, but with 5th choice from main dialog.response6 - Same as above, but with 6th choice from main dialog.response7 - Same as above, but with 7th choice from main dialog.response8 - Same as above, but with 8th choice from main dialog.response9 - Same as above, but with 9th choice from main dialog.
